Let us talk about how to install solar panels. You can use the services of an EPC installer or can do-it-yourself. Given below is the solar installation guide for an off grid solar system which is simple and easy. A prospective solar buyer can read this blog and understand how to install solar panels on his own at his home. We have already discussed about 1 kW rooftop solar system installation.
Here is the simple steps to install solar panels
Step – 1 : Solar Panel Installation Made Easy
Step – 2 : Assembly of Solar Panels
Step – 3 : Electrical Wiring
Step – 4
: Connection between Solar Panel and Solar Inverter
Step – 5
: Connection between Solar Inverter and Solar Battery
Step – 6
: Connection between Solar Inverter and Grid
Step – 7
: Start Solar Inverter through Solar Panel & Grid
Step – 8
: See Solar Panel Installation Video
Step – 1: Solar Panel Installation Made Easy
Which direction should be the solar panel face?
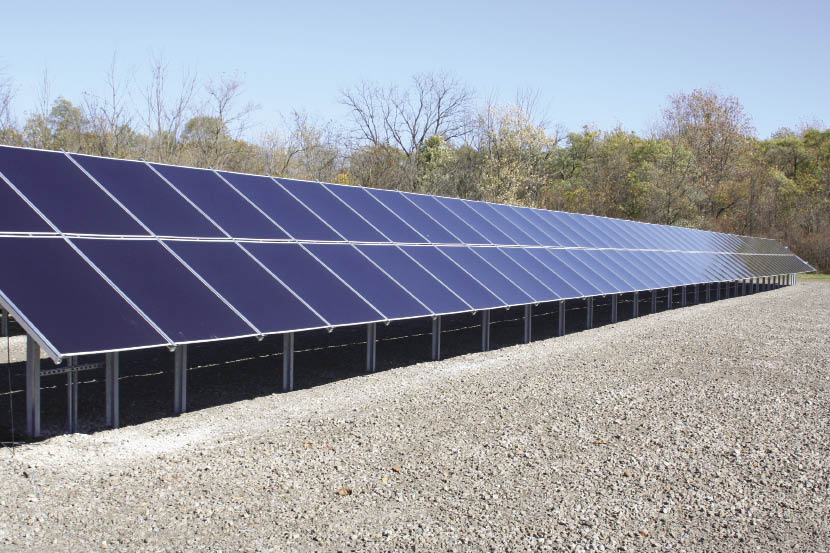
The mounting structure provides the base for the entire solar system so make sure it is sturdy and properly fastened to the rooftops of your house or commercial establishment. A typical mounting structure is made up of aluminium. The performance of the solar panels depends upon the direction in which these panels are placed. The best direction to face solar panels is south, since here they receive the maximum sunlight. East and West directions also work well. North is the only direction that we should not want to put our panels on. Since India lies in Northern Hemisphere, south direction works best here.
Rooftop Solar Mounting Structure is used to fix solar panel with it. You can fix both monocrystalline and polycrystalline panel with it. This is ready to use structure of 1 kw, offered by loomsolar.com. You can connect 4 panel of 270 watt.
In Which angle should you install solar panels?
The Solar panel tilt angle (the angle between the horizontal ground and the solar module) should be decided according to the latitude of your location anywhere in the world. It is generally believed that the modules placed at a tilt angle equivalent to the latitude of the place, would generate the maximum energy output. You can also use a solar tracker to increase the conversion efficiency.
Here are the latitudes of leading cities in India –
States –
Zone -1 : J&K, Punjab, Himachal Pradesh, Uttarakhand – 30-360
Zone – 2 : Rajasthan, UP, Delhi, Haryana, Bihar, North EASTERN STATES – 24-300
Zone – 3 : Gujarat, MP, Jharkhand, West Bengal, Maharashtra, Chhattisgarh, Orissa – 18-240
Zone – 4 : Karnataka, Tamil Nadu, AP, Telengana, Kerala – 12-180
Step – 2: Assemble Solar Panels
Once the solar structure is fixed accurately, we will connect it with solar modules. We should ensure that all nuts and bolts of solar modules are fixed with solar structure so that it is properly secured and lasts long.
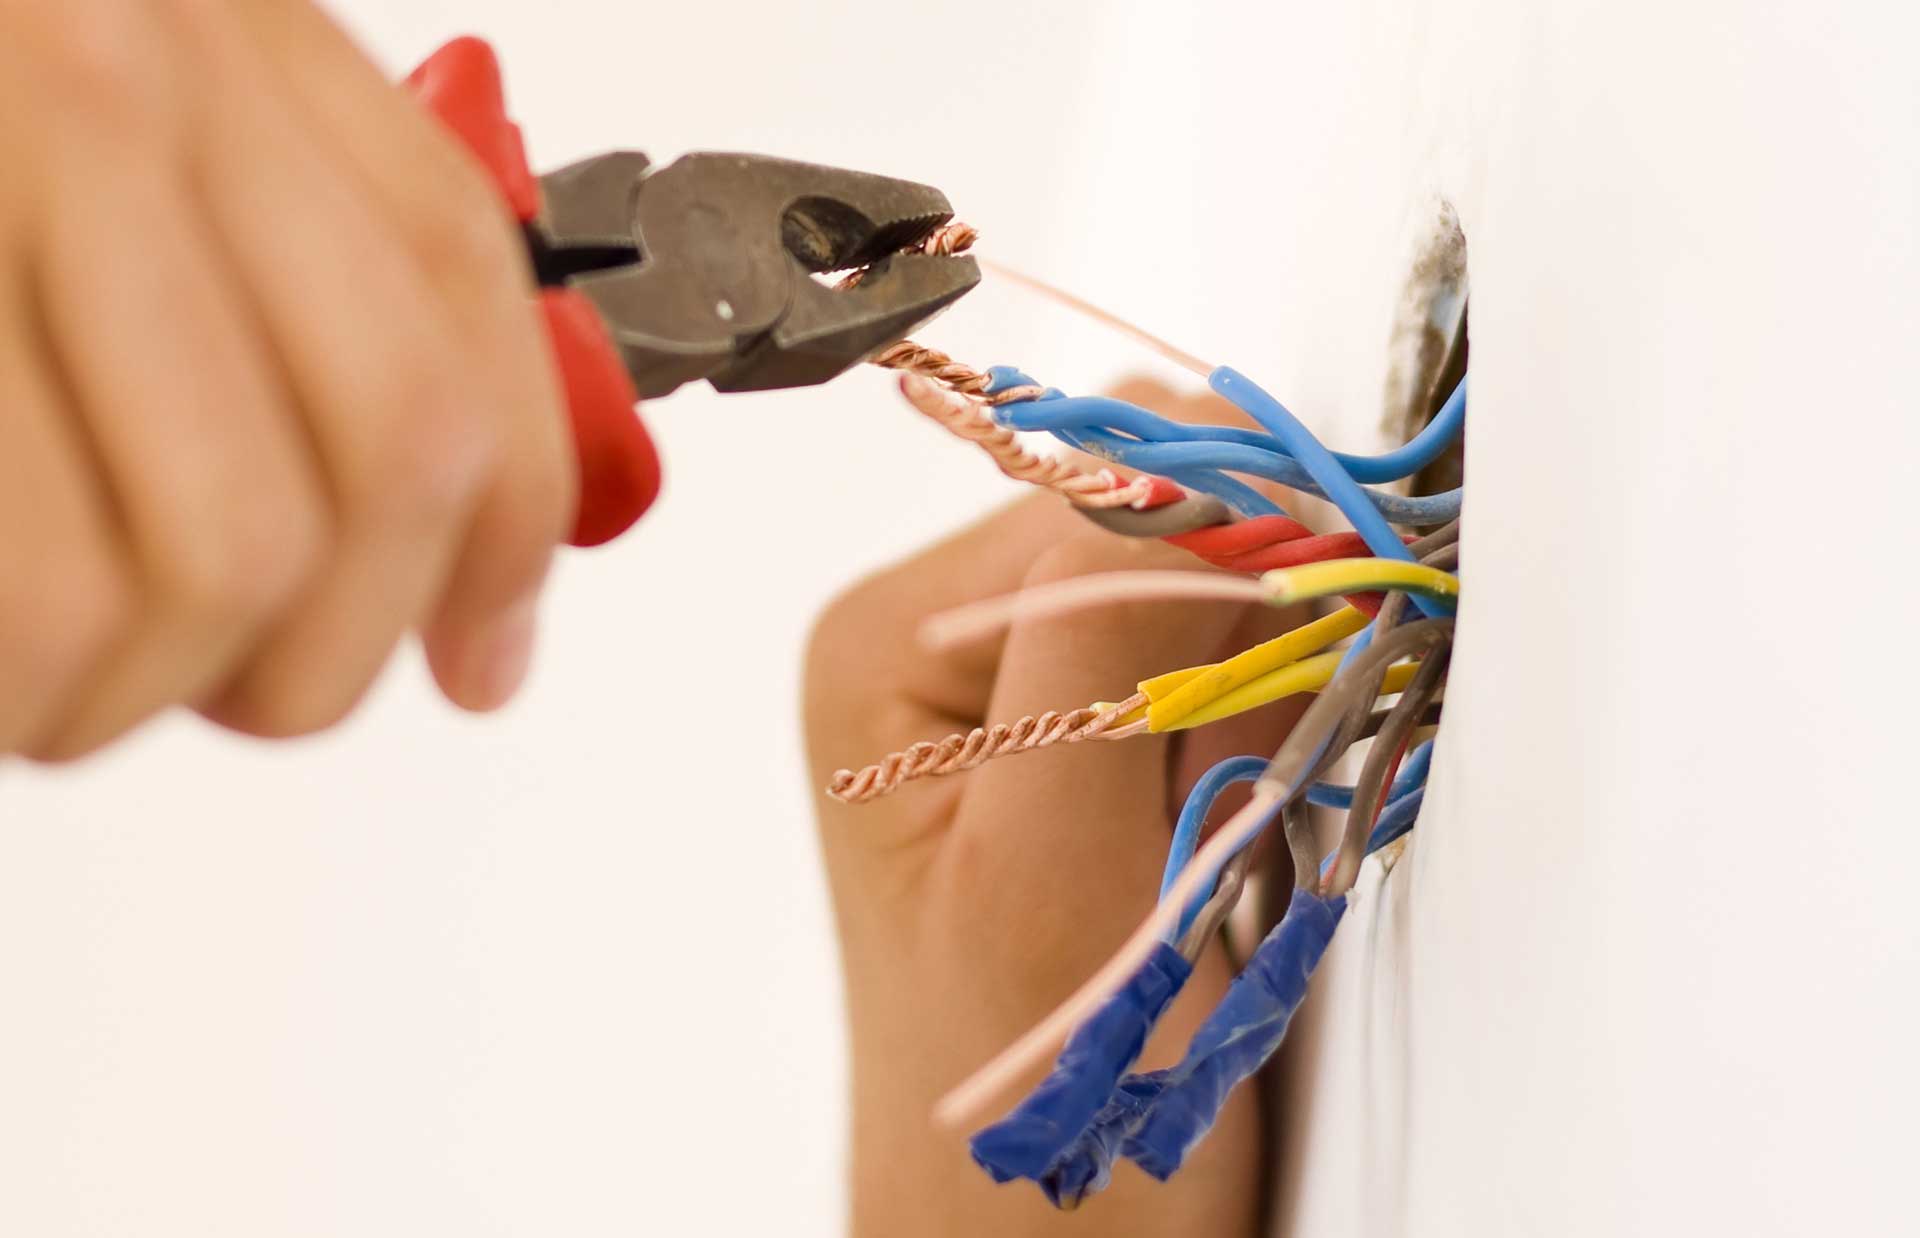
Step-3: Electrical Wiring
MC4 connectors are used to connect solar panels. These are universal connectors and can be connected with any type of solar panels. The solar array wiring becomes simpler and faster using MC4 connectors.
Few modern solar modules come with wire leads that have MC4 connectors on the ends, else they have a built-in junction box at the back with wires jotting out. In a series connection you will have to connect the positive wire from one module to the negative wire of another module. In a parallel connection, you connect the positive to positive and negative to negative leads. A parallel connection maintains the voltage of each panel while a series connection increases the voltage in order to match it with the battery bank.
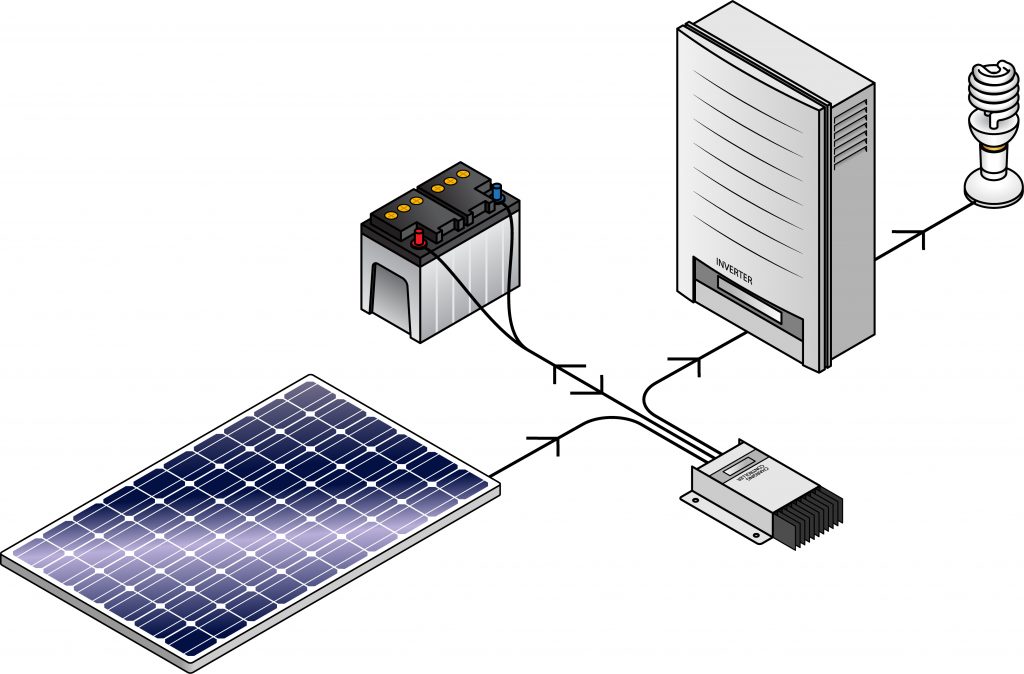
Step-4: Connection between Solar Panel and Solar Inverter
In the picture given below, the backside of an inverter is shown where solar panel wire is connected. Connect the positive wire from the solar panel with the positive inverter terminal and the negative wire with negative terminal of the inverter.
There are other connections too like battery wire connection and output wire connection with the inverter. In all, Solar panel, Solar Battery and Grid input are connected with the solar inverter to produce electricity. The output of a series string of solar modules is connected to the input of the inverter. Make sure the inverter is turned off while the connections are being done.
Step-5: Connection between Solar Inverter and Solar Battery
In an off grid solar system, Battery is mandatory where it is used to store power backup. This battery is connected with solar inverter to recharge it with solar panel and grid. The positive terminal of the battery is connected with the positive of the inverter and vice versa.
Step-6: Connection between Solar Inverter and Grid
In order to connect the inverter to the grid simply plug it in in the main power switch board, so that it gets power from the grid. The output wire is also connected with board that is supplying electricity in home.
In order to calculate the excess energy generated from the solar system we need to install a metering device. We need to connect the positive wire from the metering device with the line terminal and the negative wire to the neutral terminal of the inverter.
Step-7: Start Solar Inverter through Solar Panel & Grid
After all the connections are done, we switch on the mains. There is a digital display which shows the total solar unit generated during the day, what is supply volt and current (amp) from solar panel etc. In the picture below is shown the front side of Microtek solar inverter.